Create a form on Umbraco
The form wizard takes a form from a starting idea to a publish-ready draft in five steps: Setup → Fields → Workflow → Design → Publish.
1. Open the wizard
Sign in to the Umbraco backoffice, select MegaForm, then choose Create form under Forms.
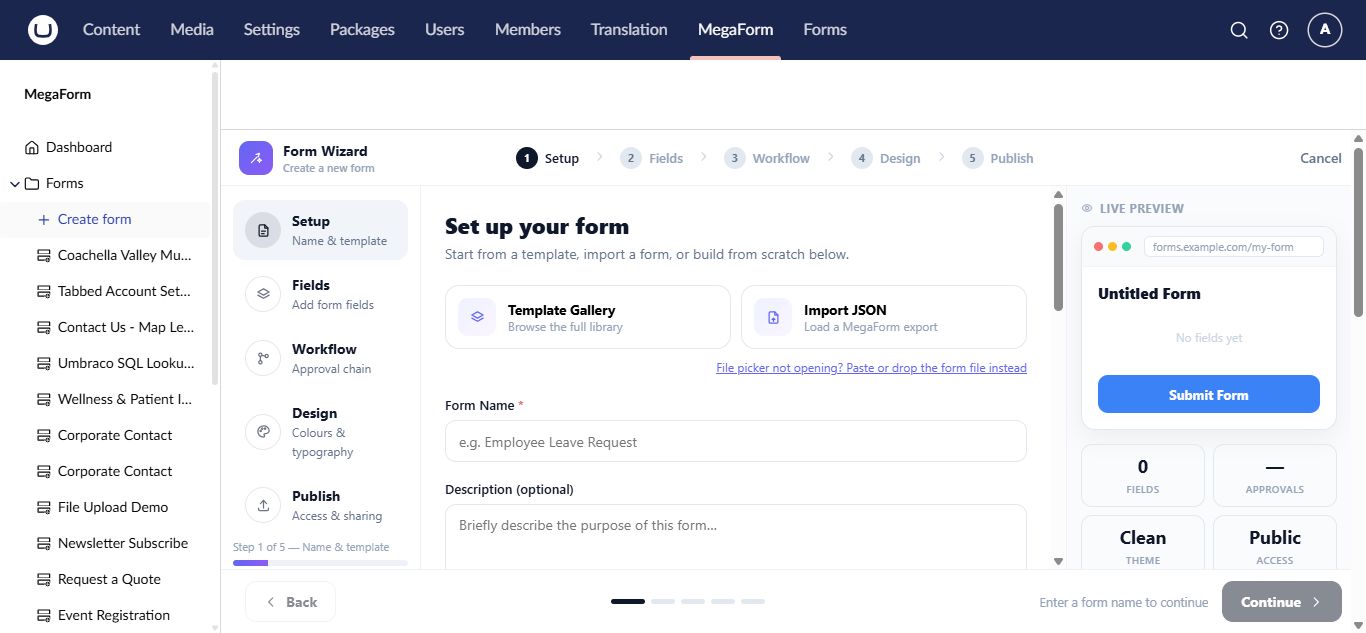
2. Choose a starting point
On Setup, enter a form name and choose one of these starting points:
- Template Gallery for a complete reusable form design.
- Import JSON for a form exported from another MegaForm installation.
- Quick start for a small, common field set.
- A blank form when you want full control.
The preview updates as you make choices. A form name is required before you can continue.
3. Add fields
On Fields, add the inputs the visitor must complete. Use clear labels, mark only essential fields as required, and split a long form into pages when it improves completion.
You can refine each field later in the full builder, including validation, options, conditional logic, and security.
4. Choose a workflow
On Workflow, keep the basic submit flow for a simple form or add actions such as notifications and approvals. You can also build a more advanced BPMN process after the form has been created.
5. Select a design
On Design, choose the theme, colors, typography, spacing, and corner style. The live preview shows the result before publication.
6. Review and create
On Publish, review access and submission behavior, then create the form. Open the form in the full builder for final adjustments, preview it, and publish when ready.
Tip
Create and test the smallest useful version first. Add complex rules and integrations only after a normal test submission appears correctly in Entries.