MegaForm for Umbraco 13 and Later
MegaForm adds a visual form workspace to Umbraco 13, 14, 15, 16, 17, and 18. Use it to create forms, publish them, review entries, automate follow-up actions, and manage access without leaving the Umbraco backoffice.
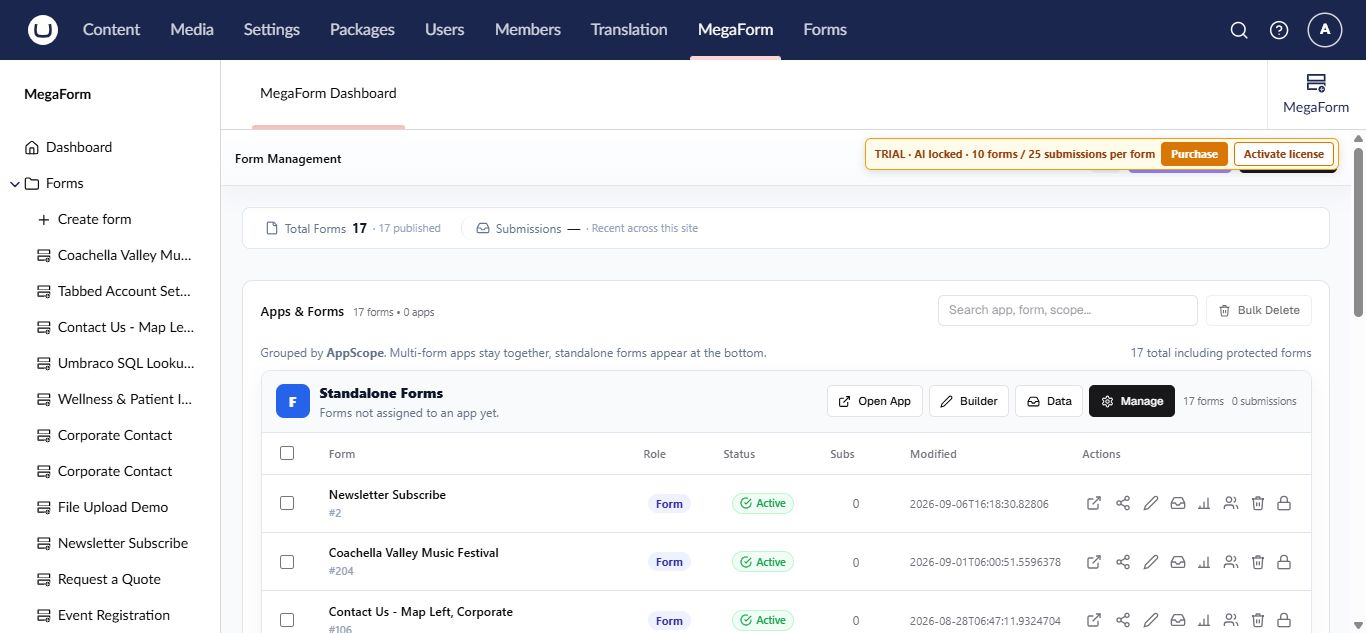
What you can do
- Build single-page or multi-step forms with drag-and-drop fields, layouts, and widgets.
- Configure validation, conditional logic, field security, themes, and form settings.
- Publish a form at its own public URL or select it on an Umbraco content page.
- Search, filter, and review submitted entries.
- Run simple submission actions or advanced BPMN workflows.
- Reuse option lists and named database sources across forms.
- Use existing SQL tables for option lists, related fields, and controlled submission targets.
- Import an Umbraco Forms definition and work with its existing submissions.
- Translate the MegaForm interface and form labels.
- Ask AI Designer to prepare a form plan that you can review before applying.
- Create a complete new form from a plain-language AI prompt.
- Inspect workflow attempts and retry a failed step from the submission history.
- Optionally run reviewed server-side C# after a saved submission when the scripting add-on is installed.
The MegaForm section
Sign in to the Umbraco backoffice and select MegaForm from the top navigation. The left navigation contains:
| Area | Purpose |
|---|---|
| Dashboard | Form totals, recent forms, quick actions, and package status |
| Forms | Create a form or open an existing form |
| Submissions | Browse entries across forms |
| Prevalue Sources | Maintain option lists shared by multiple fields |
| Data Sources | Register server-side database connections for form data |
| Security | Control what each Umbraco user group may do in MegaForm |
| Languages | Select the display language and manage translations |
| Settings | Database, payment, email, upload, CAPTCHA, AI, storage, and license settings |
Tip
Start with Install and activate MegaForm on a new site. If MegaForm is already installed, go directly to Create a form.
Typical publishing flow
- Create a form from a template, imported JSON, quick start, or a blank form.
- Add and configure fields in the visual builder.
- Review form settings and any submission workflow.
- Save a draft, preview it, then publish.
- Open the public form or select it on an Umbraco content page.
- Review new entries in Entries or Submissions.
Version compatibility
One MegaForm.Umbraco NuGet package supports Umbraco 13 and later. The package selects the
appropriate runtime and backoffice integration for the installed Umbraco version. After an
Umbraco upgrade, update MegaForm to the latest compatible release and verify the dashboard,
builder, published forms, submissions, and configured integrations on a staging site.
Place a form on a content page
Add the MegaForm Form Picker property editor to a Document Type or Block element. Content editors can then select the form on the content item and publish the page without editing a template. MegaForm also supports server-side rendering from Razor when a form ID is already known.
See Publish and place a form for the supported picker, Block Grid, and Razor options.