Creating forms (DNN)
The fastest path from nothing to a live form on DNN is the Form Wizard — five guided steps (Setup → Fields → Workflow → Design → Publish), and the form is on your page before the coffee cools. Open the Form Dashboard (admin toolbar or your dashboard page) and hit New Form.
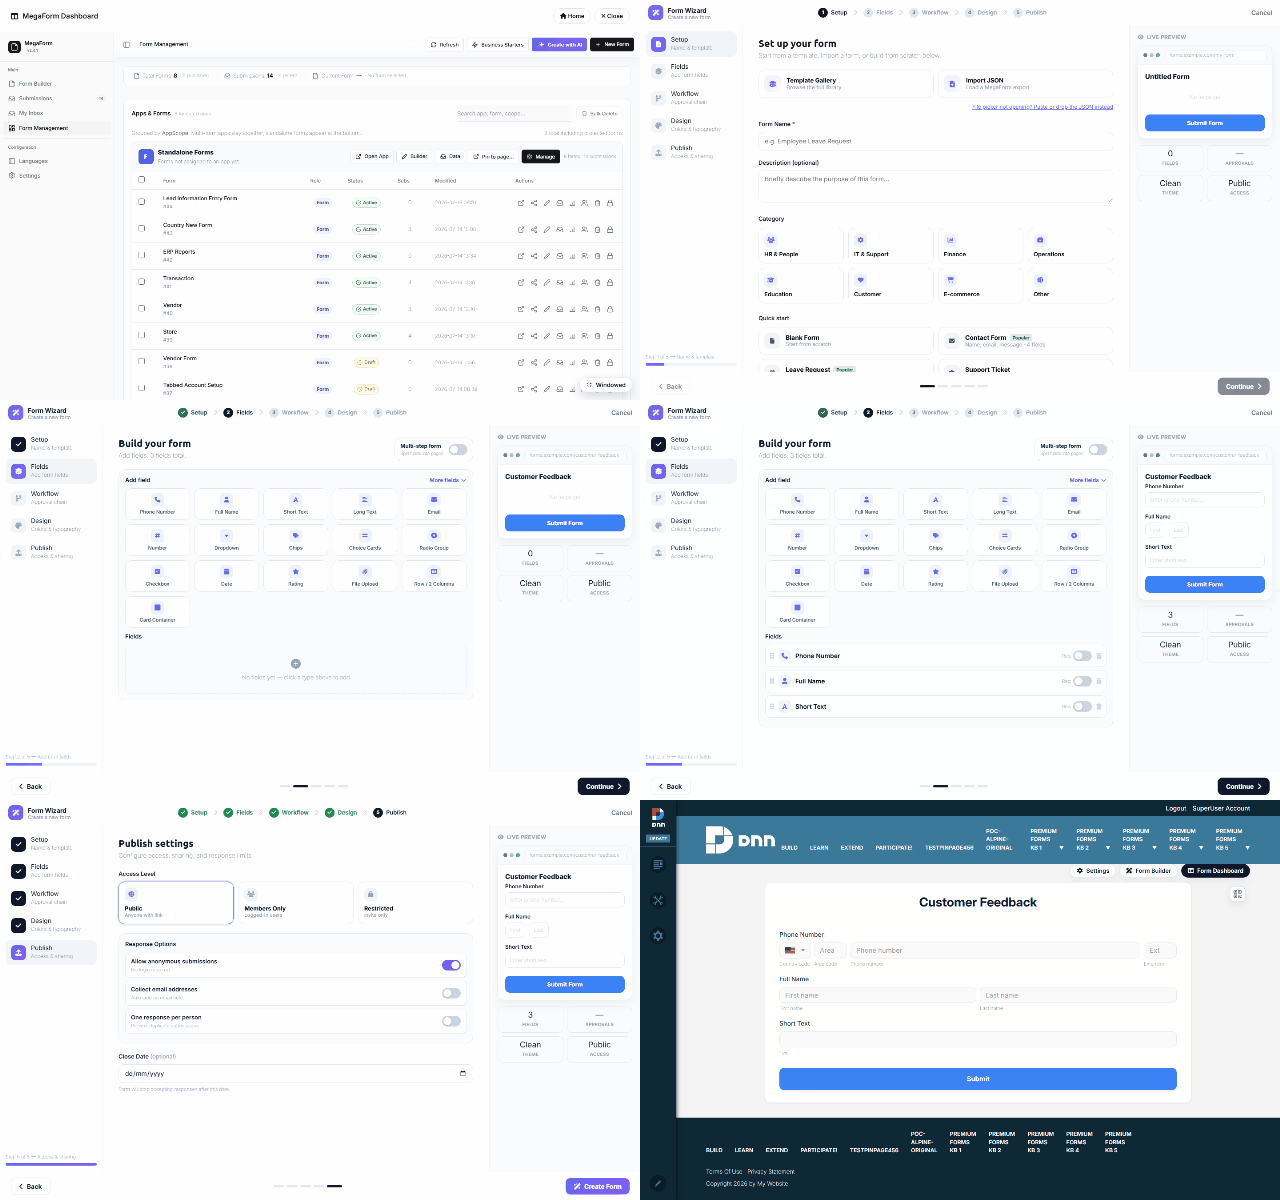
The five steps
| Step | What you do |
|---|---|
| Setup | Name the form — or skip typing entirely and start from a template / an imported JSON export. |
| Fields | Click field cards to add them — Full Name, Email, Phone Number, Long Text, ratings, uploads… Each click drops a preconfigured field (the Phone card, for instance, arrives with country code + area + extension already wired). A live preview builds alongside. Multi-step forms are one toggle (+ Add Step). |
| Workflow | Optionally attach an approval chain now (or later — see Workflow). |
| Design | Colors & typography presets — the theme is per-form and can be tuned later in the builder. |
| Publish | Access & sharing, then Create Form. |
The wizard saves a complete draft and — when launched from a page's module — binds it to that page, so the working form is immediately in front of you (that's the last shot in the recording: the Customer Feedback form, live, with the three fields added in step 2).
Wizard, AI, or builder?
- Wizard — the structured five steps above; best when you know the fields you want.
- ✨ Create with AI — describe the form in a sentence and let the AI Form Designer draft it.
- Form Builder — the full drag & drop designer for anything the wizard doesn't cover: layout rows, widgets, rules, per-field permissions — see Form Builder.
All three land in the same place: a form you can keep editing in the builder at any time.